A policy is a document or resource that outlines your organization’s expectations, rules, or required acknowledgments. Policies are attached to courses so learners can review and acknowledge them as part of their training experience. This helps ensure learners understand and comply with your organization’s requirements.
Add a Policy to a Course
-
Go to Content > Content Library
-
Search for the course you want to add the policy to, then select Configure on the course card
-
Locate the module where the policy belongs
In newer courses, look for the label next to the module title that says This module supports policies
-
Expand the module and scroll to the MyPolicy page
Select Add Policy on the right side of the page
-
Choose the policy format that matches your content
Options include PDF, Rich Text, or Link, then select Next -
Enter a name in the Policy Name field
Choose a name that is clear and meaningful for both administrators and learners, as this name appears in the course. -
Add your policy content
Upload a PDF, enter text using the rich text editor, or paste a URL, depending on the format you selected. Double‑check formatting before continuing. If using a URL, make sure it begins with http:// or https://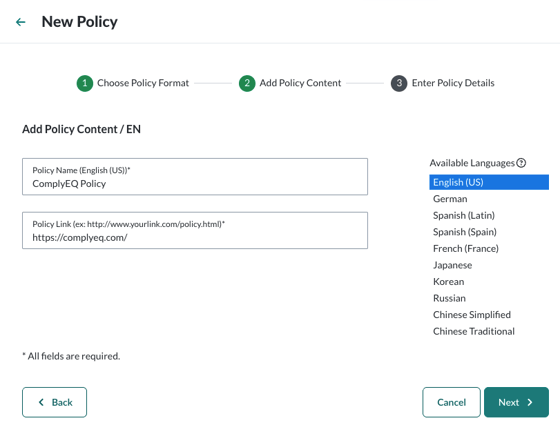
-
To upload a version of the policy in another language, follow the steps in the Add a Policy in Another Language article.
Best Practice: Before uploading and sharing policies or resources, scan files using your organization’s approved virus detection software to ensure they are safe and free from malicious code. -
Select Next
-
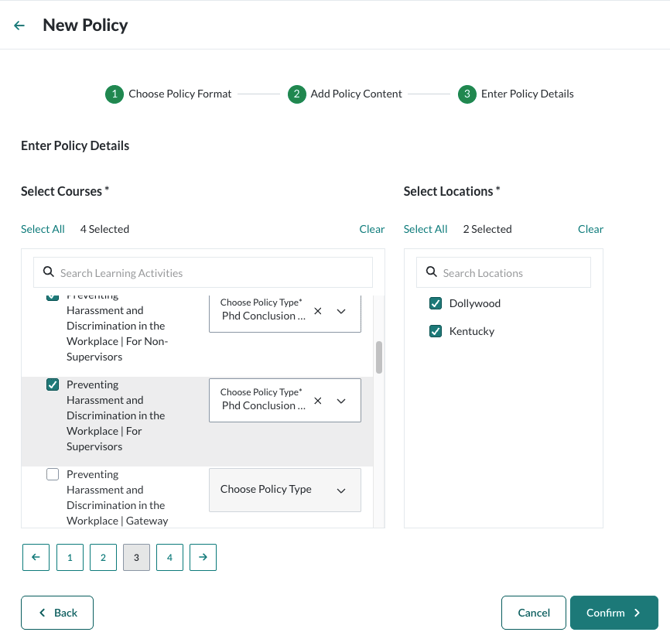
Apply the policy to courses
The policy is automatically attached to the course you selected. If needed, you can also apply the policy to multiple courses by selecting the checkbox next to each course name.Some courses support more than one policy type. Use the dropdown next to the course name to specify the policy type you’re adding.
- A single policy can be applied to multiple courses
- A single policy cannot be applied to multiple policy types within the same course
-
Select the locations where the policy should appear
Learners assigned to those locations will see and acknowledge the policy.This allows you to display different policies to different learner groups within the same course. For example, learners in California can see a California‑specific policy, while learners in New York see a New York‑specific policy.
-
Select Confirm
-
Add a custom title or header to the policy page
A custom header is required for the policy page to appear for learners.
Note: If you have more than one policy uploaded per type, learners could proceed to the end of the course without signing all policies, and be prompted to sign the rest afterward.